2. Fabric Onboarding Process
Setup Fabric Workspace
Prerequisites
- Only a Capacity Admin has the permission to install the Microsoft Fabric Capacity Metrics App.
- Ensure you have the required role before proceeding.
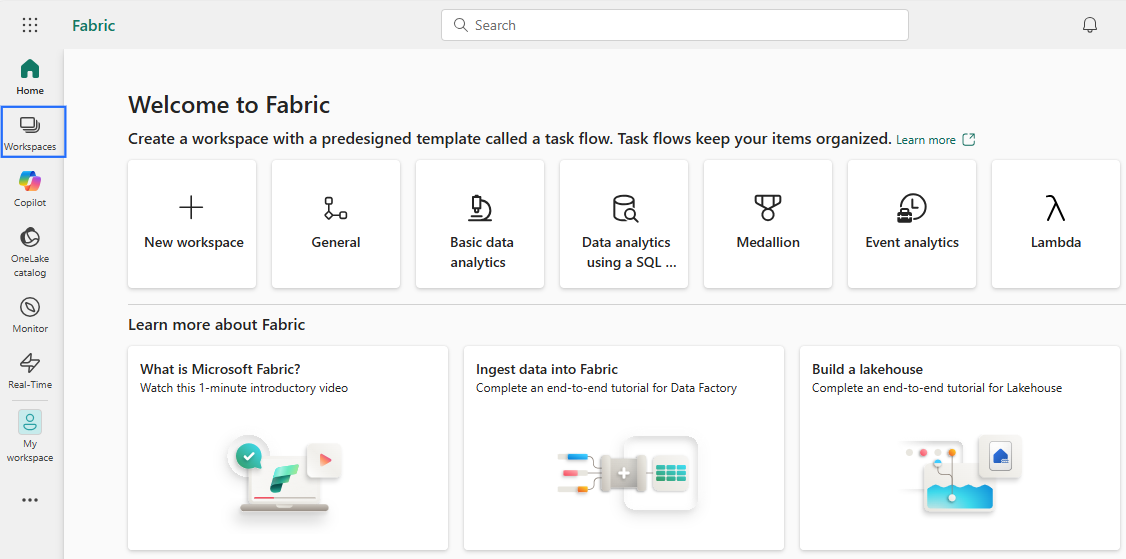
Step 1 : Access Microsoft Fabric
- Navigate to Microsoft Fabric.
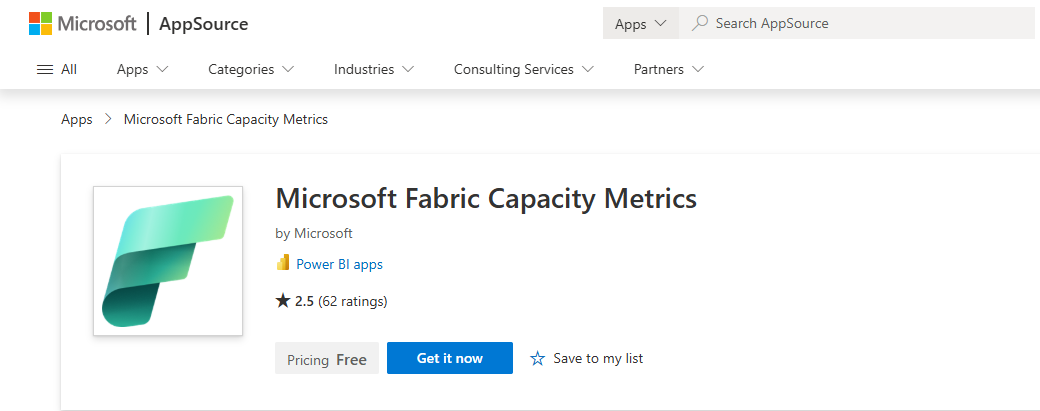
Step 2 : Install the Microsoft Fabric Capacity Metrics App
Microsoft Learn – Installation Guide
Step 3 : Select the Workspace
- Click on Workspace in the navigation pane.
- Select the specific Microsoft Fabric Capacity Metrics workspace where you want to create and run the notebook.

- Click Save to confirm the selection.
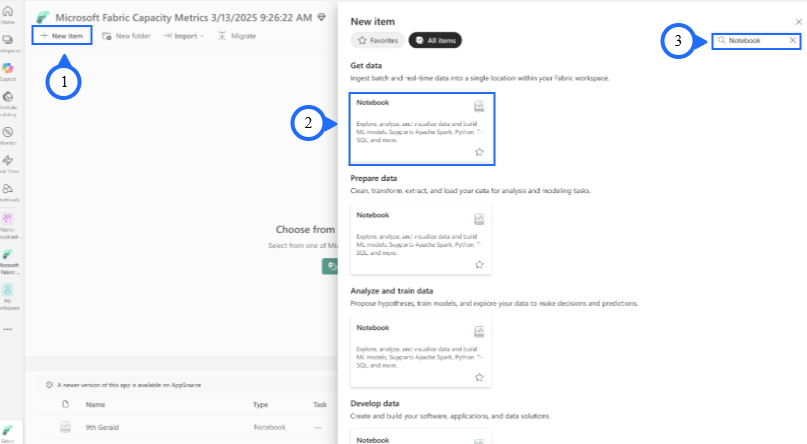
Step 4 : Create a Notebook
-
In the workspace, select New item, and then choose Notebook.
-
Wait for the notebook environment to load.
Step 5 : Open the Notebook
- In your Fabric workspace, open the notebook you created.
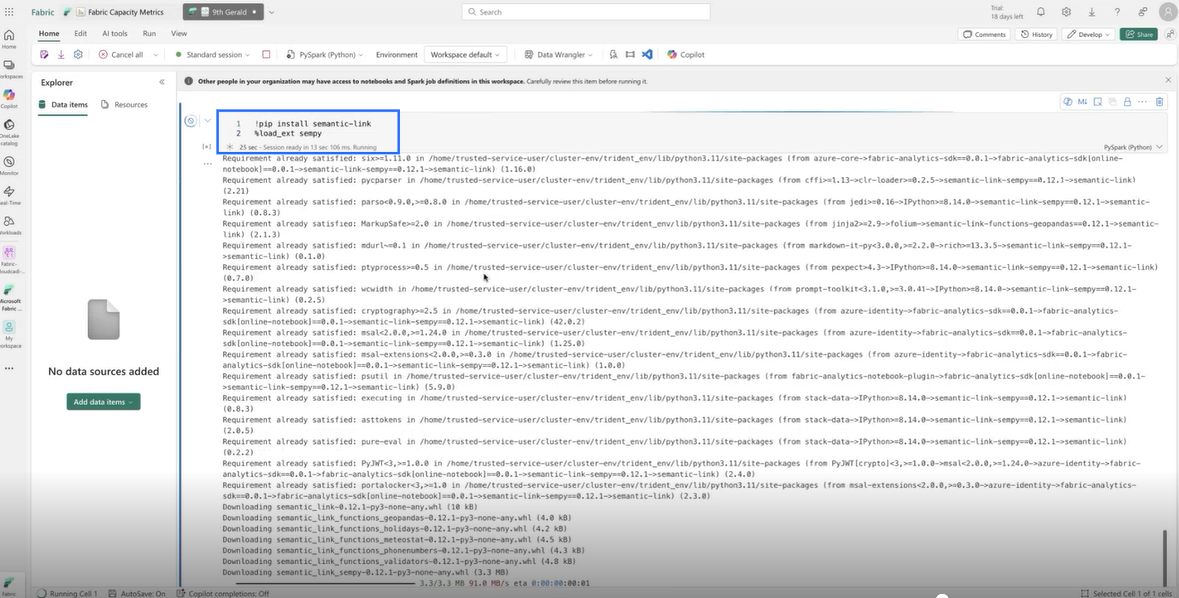
Step 6 : Install Required Libraries
-
Locate the first code cell at the top of your notebook.
-
Enter the following commands in this cell to install and load the required libraries:
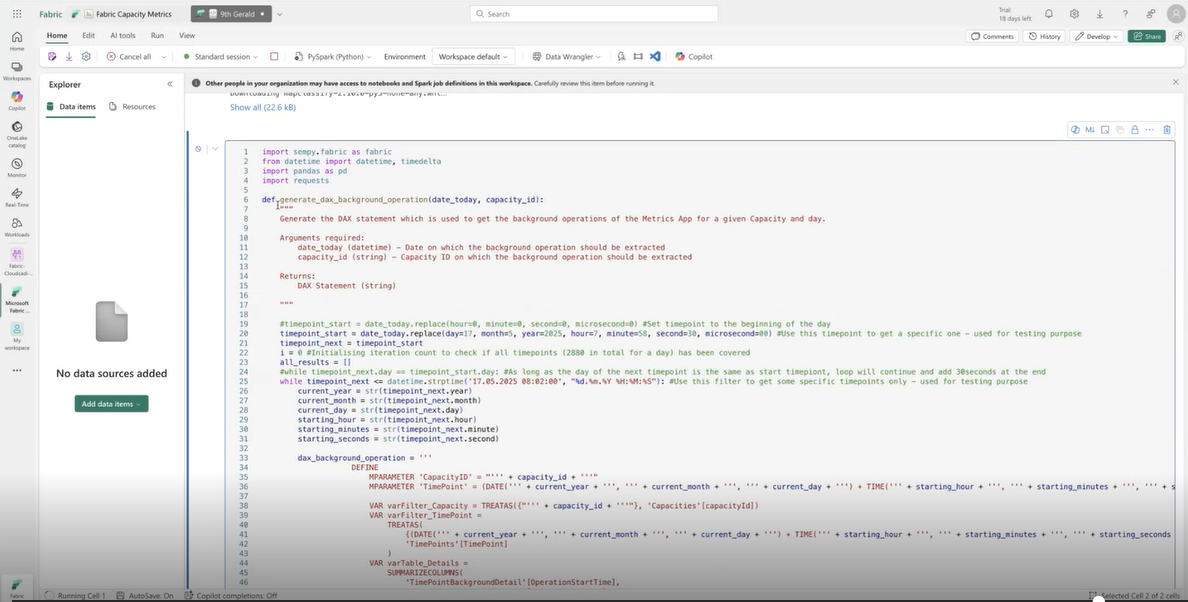
Step 7 : Add Python Code
-
Paste the provided Python notebook code into the subsequent cells
-
Fabric Capacity Notebook Code: Fabric Capacity
-
The code extracts Fabric capacity metrics using the semantic-link and sempy.fabric libraries.
Step 8 : Run and Validate
-
Execute each cell to ensure all dependencies are installed correctly.
-
Verify that the notebook successfully connects to the Microsoft Fabric capacity.
Step 9 : Update the Azure Function App URL
- Open the Python notebook code and Locate the line that contains the Azure Function App URL.

- Replace the existing URL with the latest CloudCADI Azure Function API URL.
How to get Function App URL ?
- Navigate to App Services and Select your Function App.
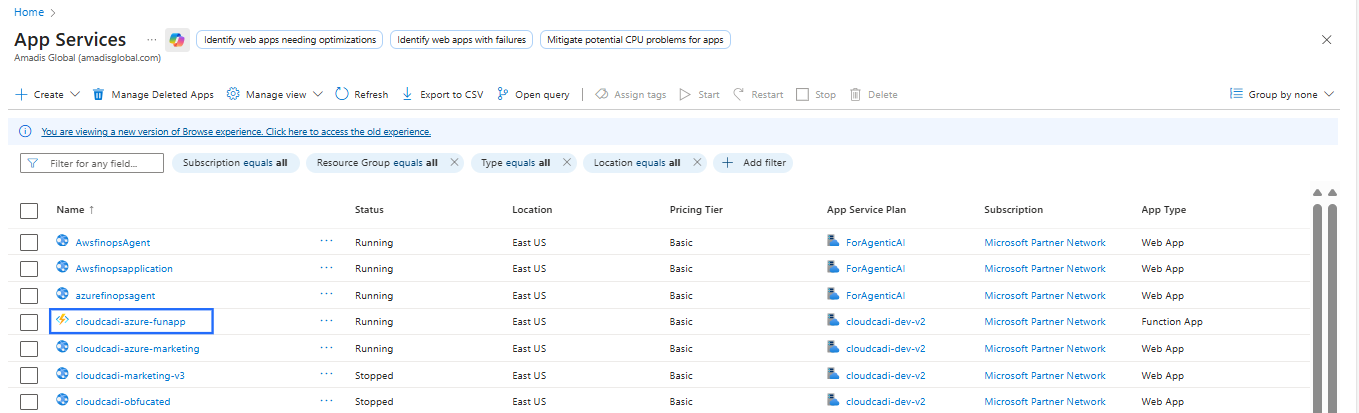
- The Function App name corresponds to the default domain name, and the Function name appears at the top (cloudcadi-azure-funapp).

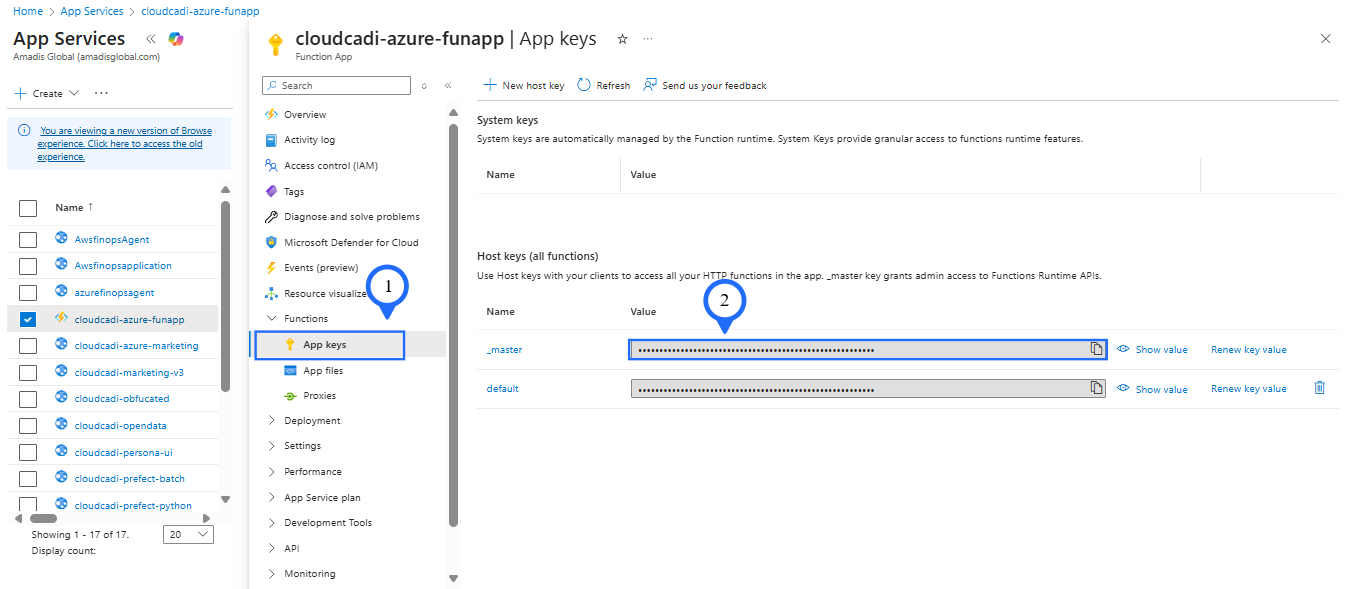
- To get the Function App Key, go to Functions select App keys and copy the required key.
Step 10: Verify Retrieved Metrics
Fabric Capacity Metrics
Once the notebook executes successfully, verify that it retrieves the following Fabric capacity metrics:
- BillingType
- Status
- OperationStartTime / OperationEndTime
- User
- WorkspaceName
- TotalCUInS
- PercentageOfBaseCapacity
- Throttling
- TimepointCUs

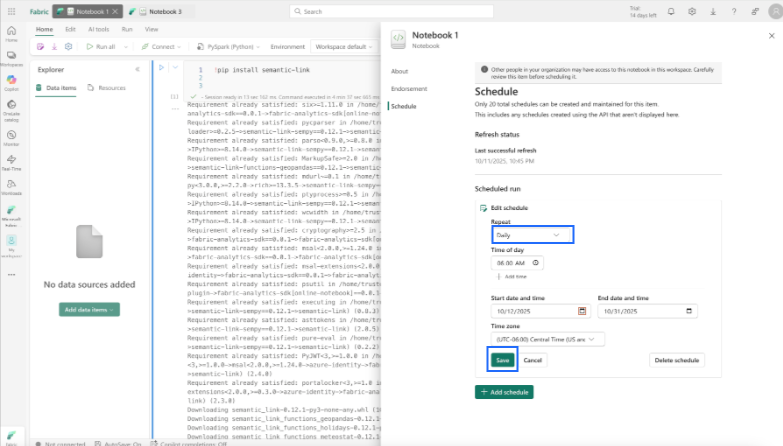
Step 11 : Schedule the Notebook
Once you have verified that the notebook runs successfully, you can schedule it to run automatically.
Note
- Scheduling the notebook ensures that Microsoft Fabric Capacity metrics are automatically collected and updated at regular intervals (e.g., daily or weekly), without requiring manual execution.
How to Schedule the Notebook?
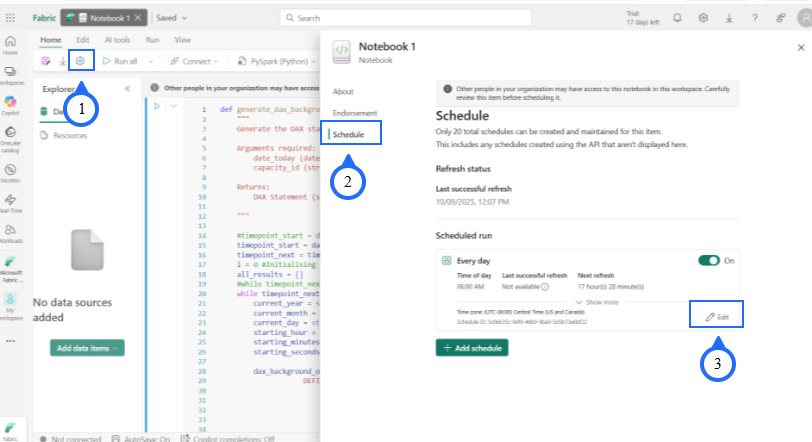
-
Click the Notification icon in your notebook toolbar.
-
You can find the Schedule panel on the right side.
-
Click the Edit option to modify your schedule settings.
In the Edit Schedule panel:
-
Set the schedule to run Daily.
-
Define the period during which the schedule should remain active.
-
Click Save to confirm and activate the schedule.
- The notebook will now execute automatically based on the defined recurrence.