Service Principal Configuration and Access Control
Service Principal Configuration
This section provides details about the options that need to be configured to enable Single Sign-On (SSO) for the App Service. It also covers the permissions required for reading data from Log Analytics.
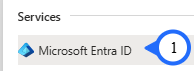
- Step 1: Log in to Azure Portal and Open "Microsoft Entra ID".
-
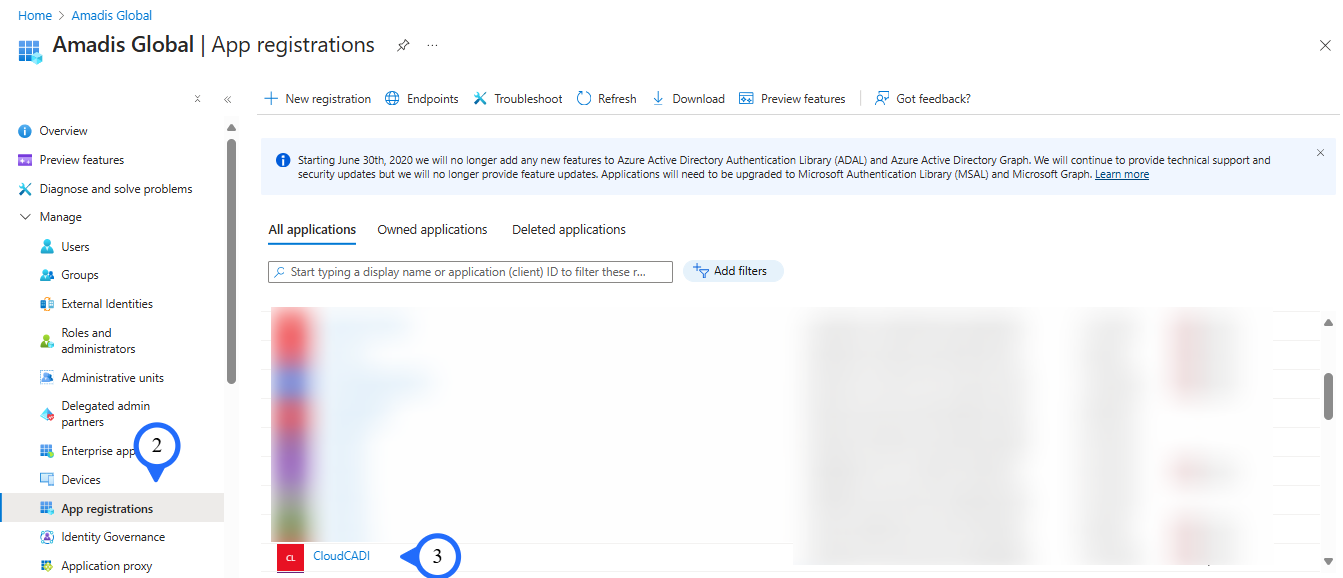
Step 2: Extend Manage section and Click on “App registrations”
-
Step 3: Select the “Service Principal” chosen during the Managed App creation.
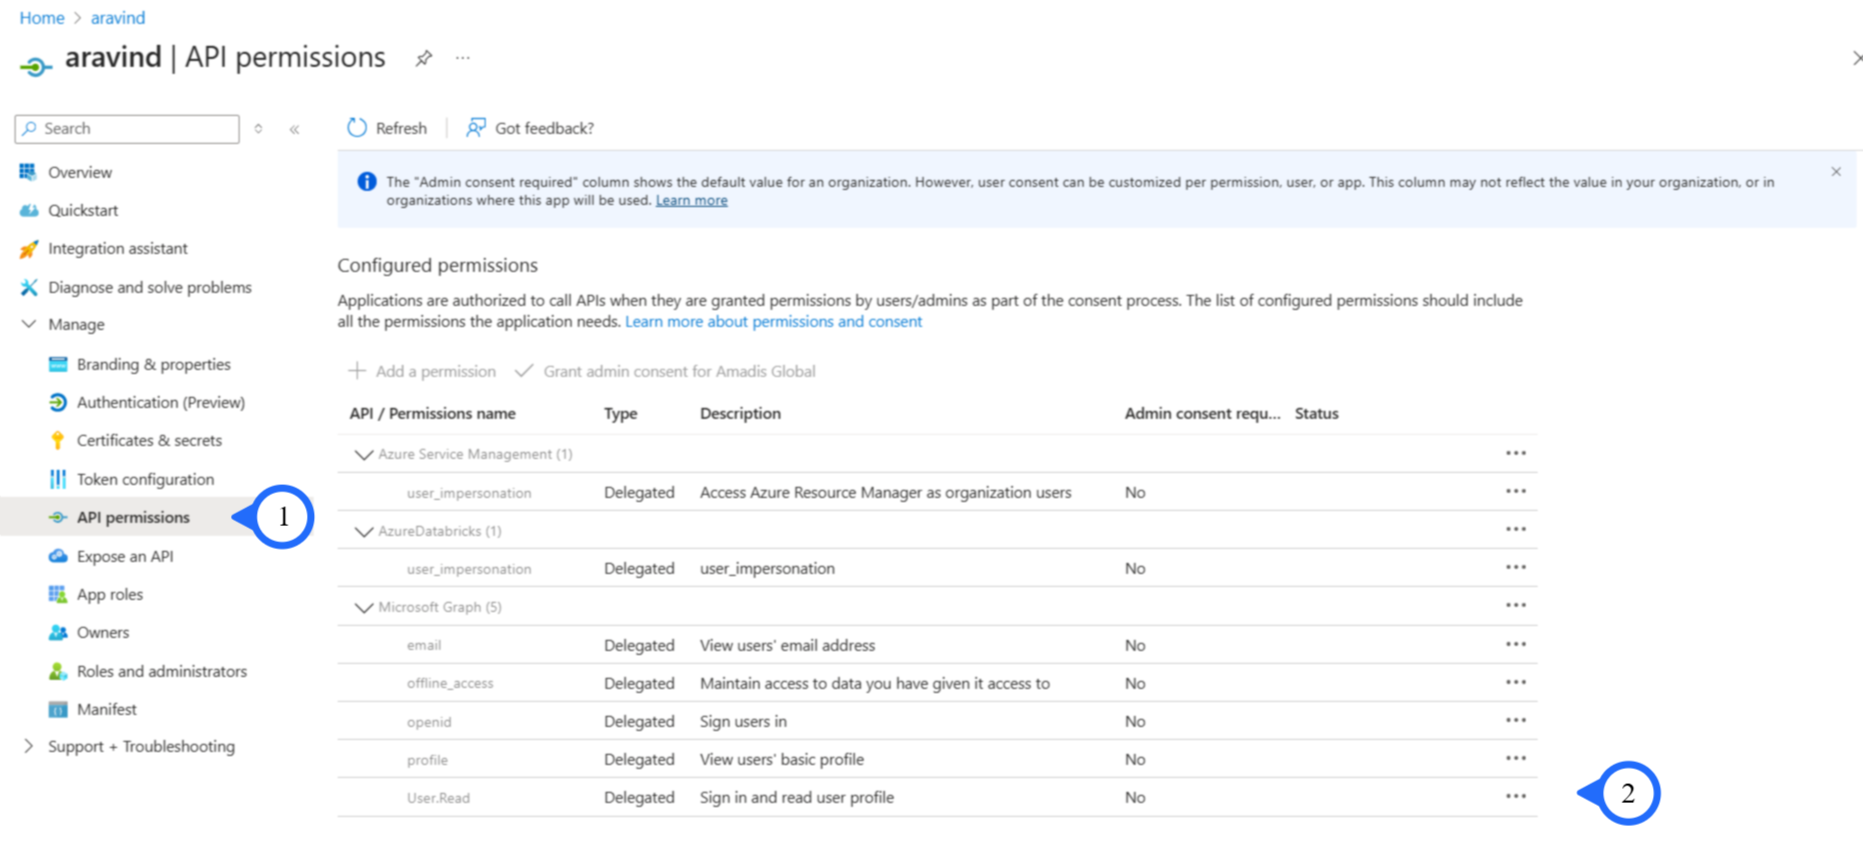
- Step 1: CLick On : “API Permissions”.
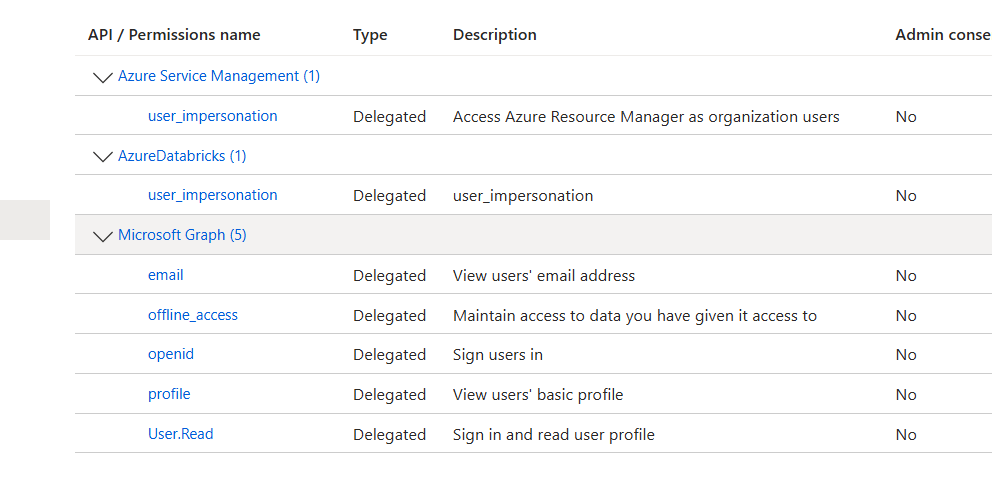
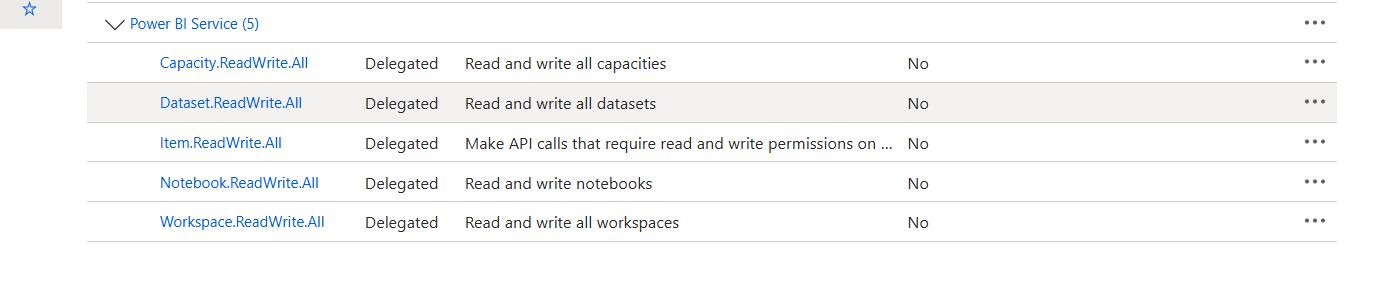
- Step 1: Select : “Following permissions”.
Setting up Authentication for the CloudCADI App service
-
Step 1: From the Managed Section, Click on the "Authentication" Tab.
-
Step 2: In the right panel click on "Add a Platform"
-
Step 3: Select "Web" from the Popup window.

-
Step 4: In Configure Web Plane,
-
Enter Redirect URI:
https:// <App service URL> /api/v3/azure/auth/callback -
Enter Front-channel logout URL:
https:// <App service URL> /login -
Step 5: In the Implicit grant and hybrid flow,
-
Enable 'Access Token'
-
Enable 'Id Token'
-
Step 6: Click "Configure" Button.
Setting Microsoft Entra Id(Azure AD) Single Sign-On (SSO):
Prerequisites : - Allow user consent for apps from verified publishers, for selected permissions in the consent and permissions tab of Enterprise Applications.
- Step 1: Click on : "User Consent settings".
- Step 2: Click On : "Allow User Consent for apps from verified publishers".
- Step 3: Click On : "Select Permissions to classify Low impact".

- Select The Following Permissions
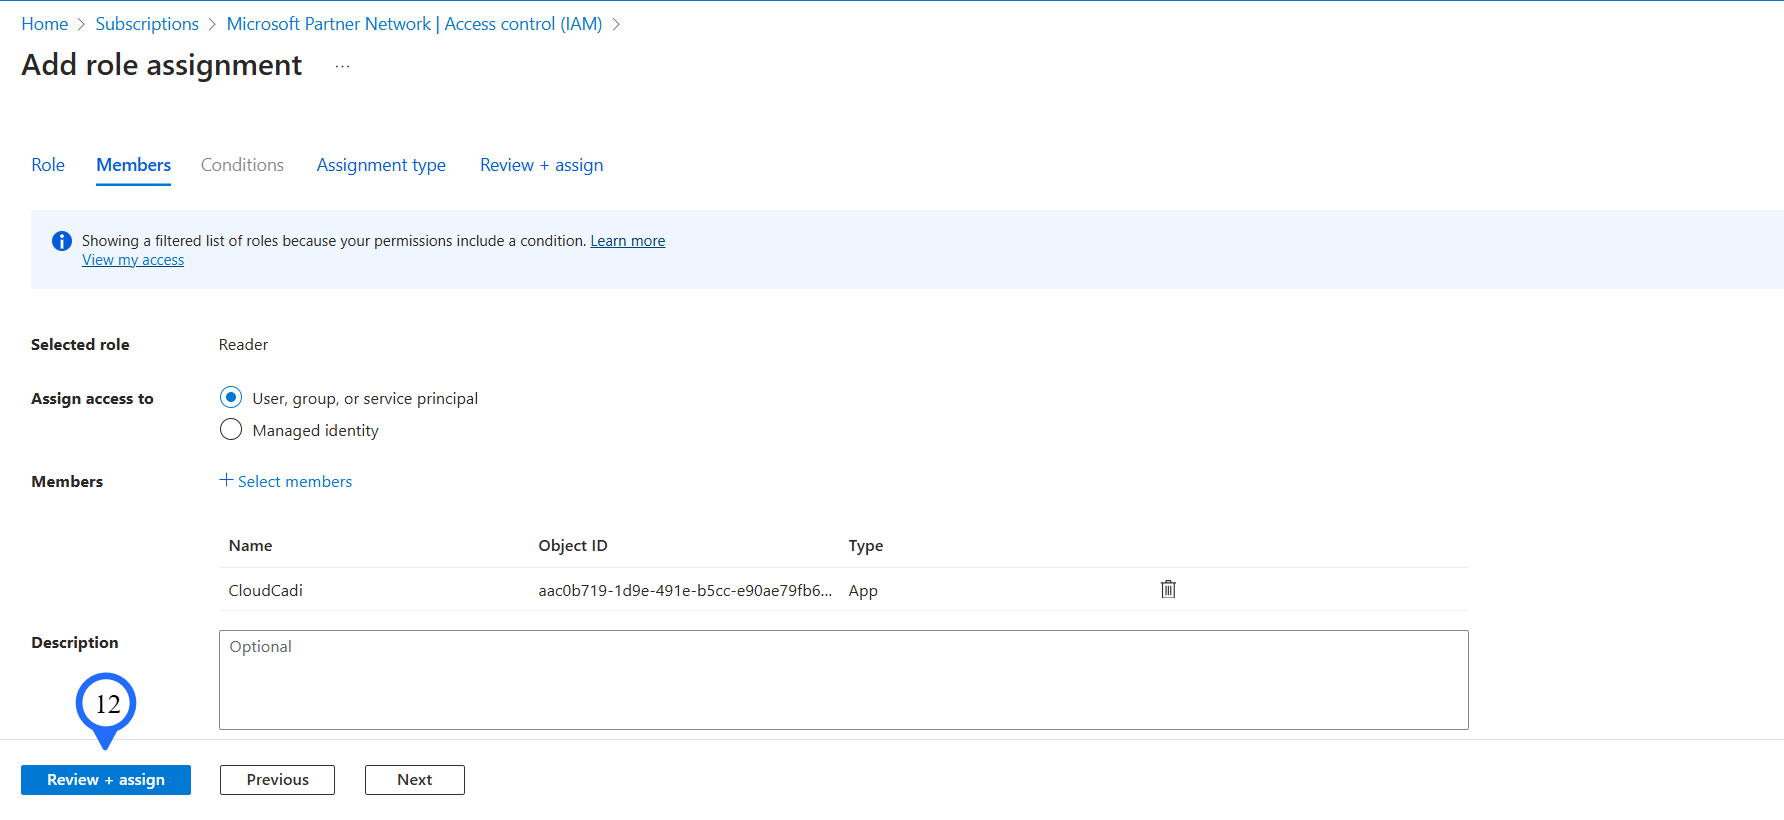
Setting up Subscription level Reader Role
-
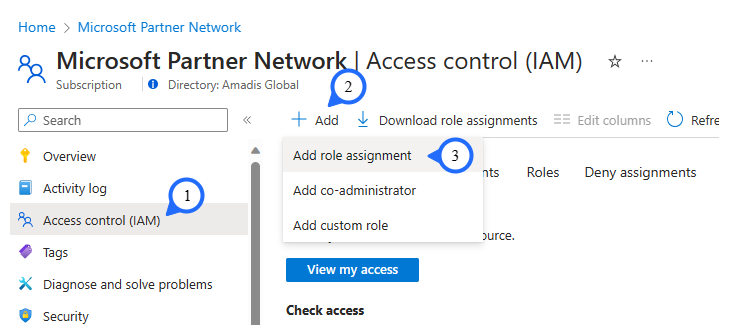
Step 1: Open "Subscription" from the 'azure portal' Select the "Access Control (IAM)" from the left side panel.
-
Step 2: Click on "+Add" at the top.
-
Step 3: Select "Add Role Assignment".
-
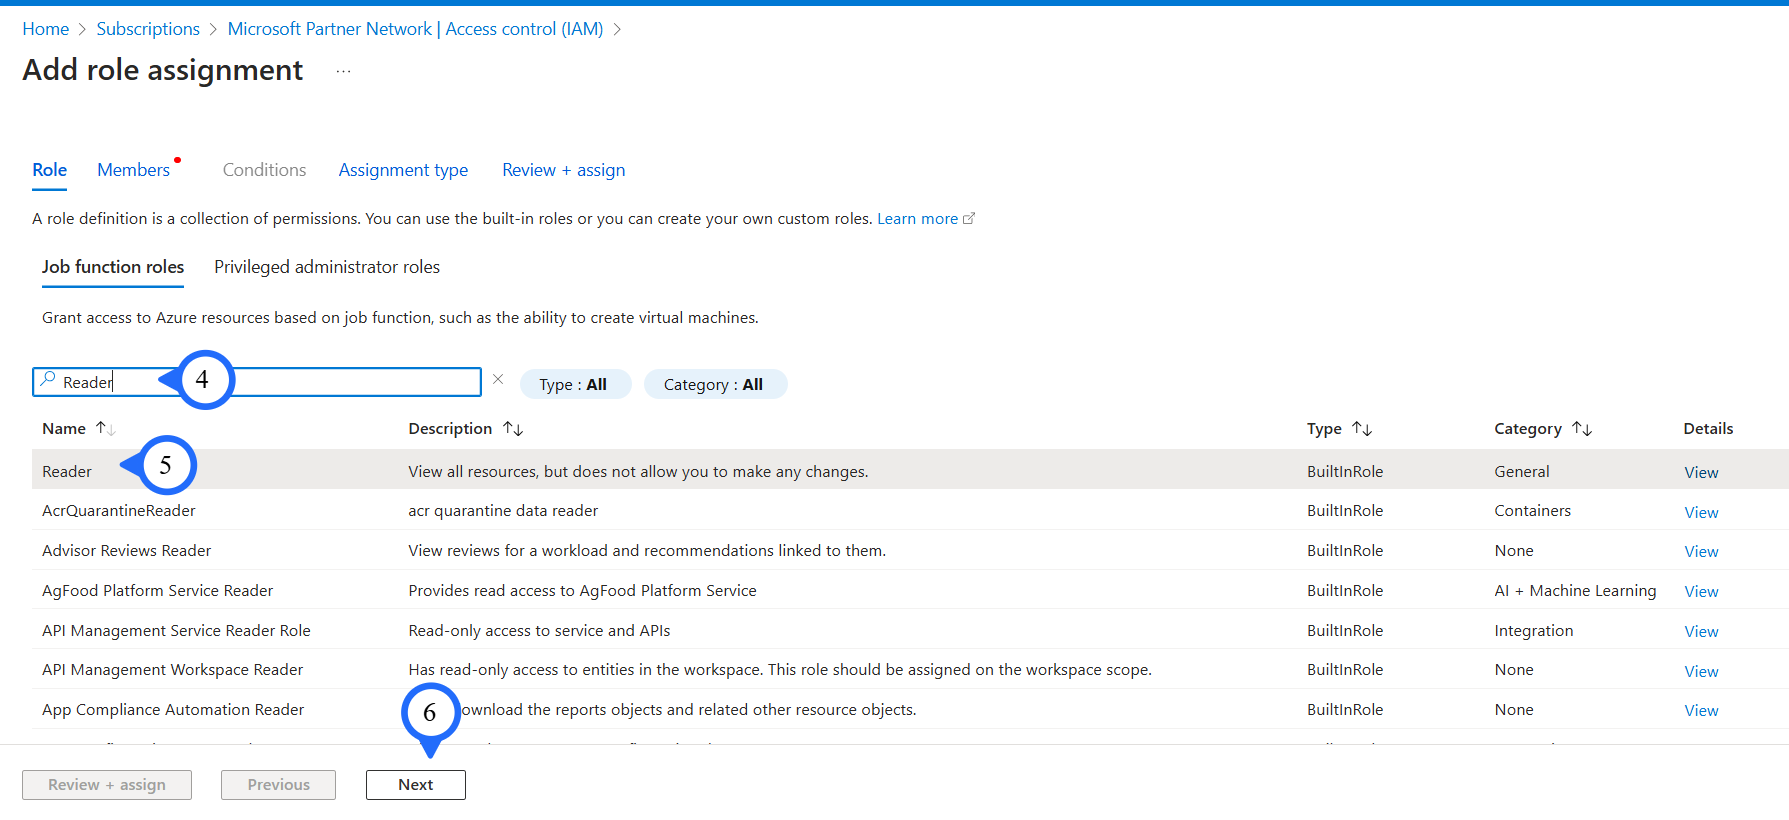
Step 4 & 5: Search and select "Reader".
-
Step 6: Click on "Next" button.
-
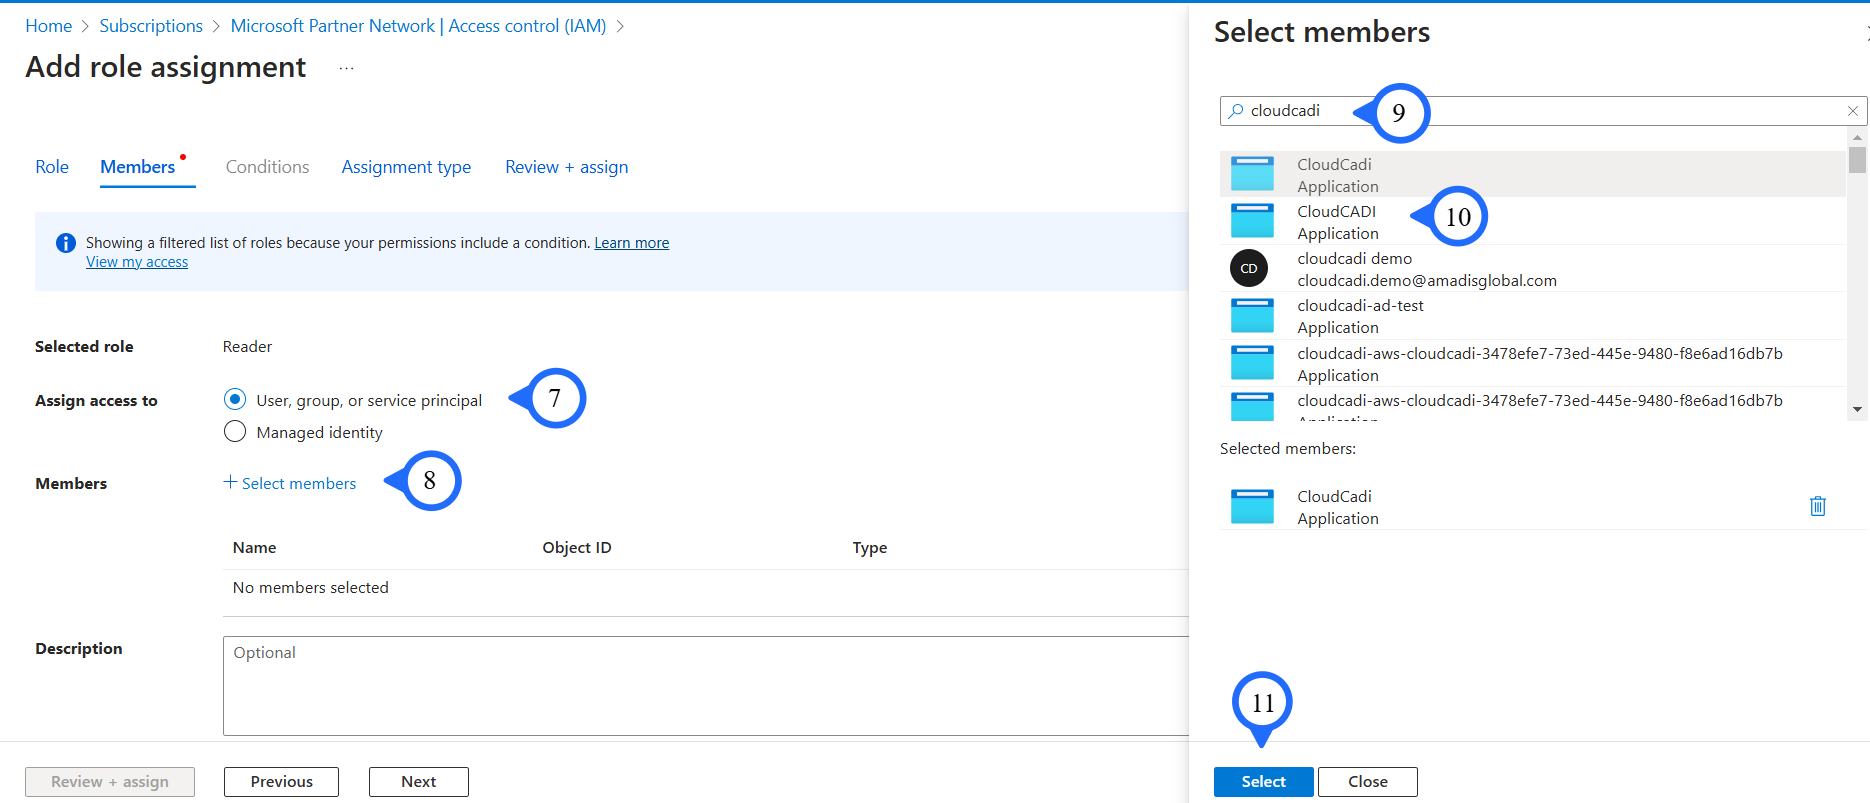
Step 7: Select Assign access as "User, group, or service principal".
-
Step 8: Click "+ Select Members".
-
Step 9 & 10 & 11: Choose the Service principal that is created during the managed app creation process and click on "Next"
- Step 12: Click on the "Review + assign" button.